
This article takes the community-test tool as an example to comprehensively demonstrate the entire process of AREX API automated regression testing, from AREX Agent configuration to recording and replay, and issue troubleshooting.
AREX is an open-source automated regression testing platform based on real requests and data (https://github.com/arextest). It leverages Java Agent technology and comparison techniques to enable fast and effective regression testing through traffic recording and playback capabilities. It also provides a rich set of automation testing features, including interface testing and interface comparison testing, making it easy to use even for users without programming skills.
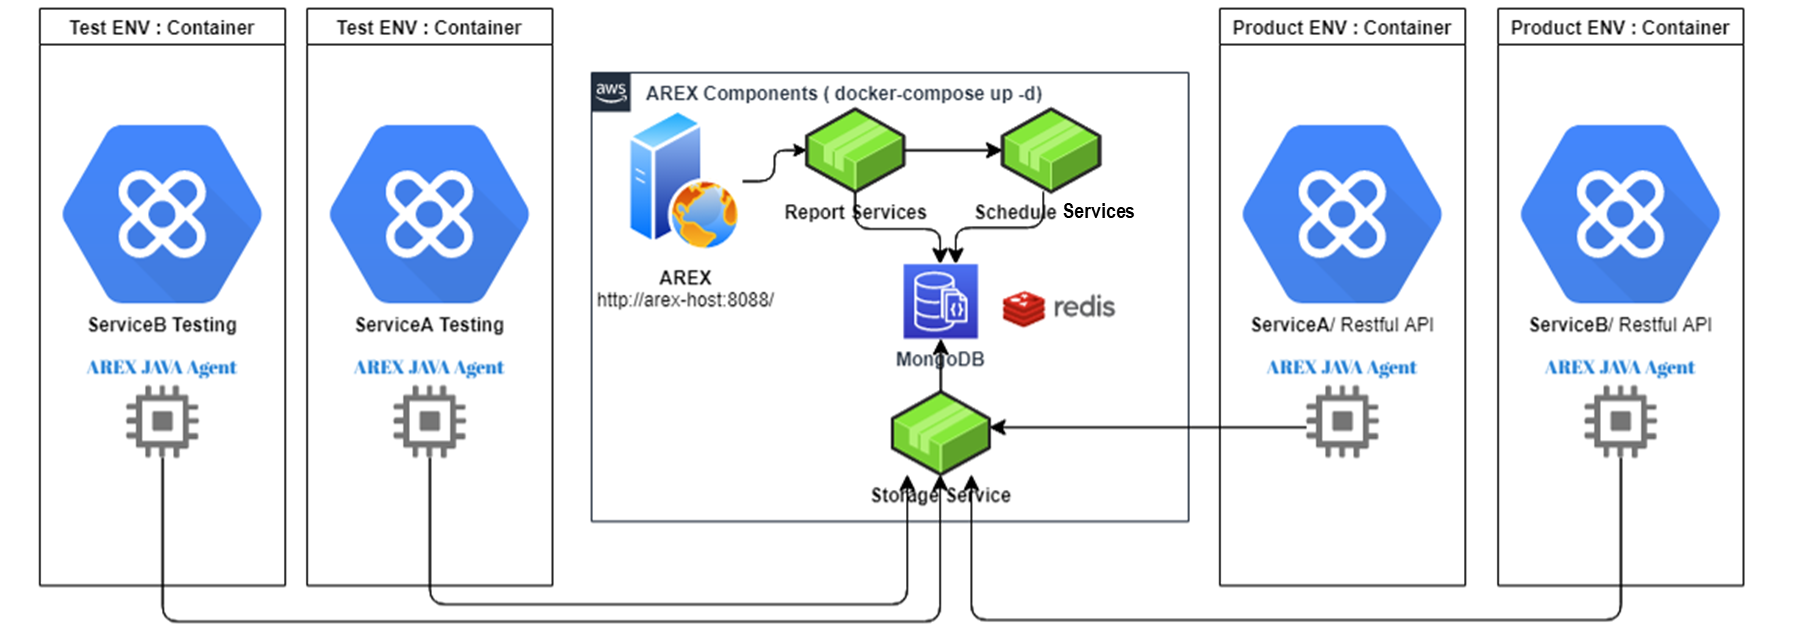
When using the traffic recording feature of AREX, the AREX Java Agent records the data flow and request information of Java applications in the production environment. It sends this information to the AREX Data Storage Service, which imports and stores the data in a MongoDB database. When performing playback testing, the AREX Schedule Service retrieves the recorded data (requests) of the tested application from the database through the Data Storage Service based on user configurations and requirements. It then sends interface requests to the target verification service. At the same time, the Java Agent returns the recorded responses of external dependencies (external requests/DB) to the tested application. After the target service completes the request logic, it returns the response message. The Schedule Service compares the recorded response with the playback response to verify the correctness of the system logic. It then pushes the comparison results to the Analysis Service (Report Service), which generates a playback report for testing personnel to review. Throughout this process, the AREX Cache Service (Redis) is responsible for caching mock data and comparison results during the playback process, improving the efficiency of the comparisons.
This article takes the community-test tool as an example to comprehensively demonstrate the entire process of AREX API automated regression testing, from AREX Agent configuration to recording and playback, and issue troubleshooting.
community-test (https://github.com/arextest/arex-community-test) is a tool provided by AREX for testing and validating the functionality of the AREX system. It is a Java application that relies on MySQL and Redis and is used to simulate business services.
AREX runtime environment
I have applied for a Linux server in the application environment, which is provided by the OPS team.
The server has an IP address of 10.5.153.1 and is equipped with 128GB of memory and 32 cores. It can be accessed through the company's internal network but is not accessible from external environments. The main purpose is to install the AREX service and deploy the testing environment for community-test on this server.
To ensure that the server can access the public network, some settings need to be configured. During the installation process, you will need to download the installation package for AREX and obtain the code for community-test to compile and deploy. If your server can directly access the public network, you can skip the proxy setup step. Otherwise, you will need to set up a proxy to ensure that the server can access the public network.
In terms of ports, there are no restrictions on the number of ports exposed externally. However, currently OPS has imposed limitations on each server, where by default only ports 80 and 8080 are allowed for external access, while other ports are blocked by default.
Additionally, remote access is restricted, and for this demonstration, we will be accessing the server through a jump host.
Regression testing by recording and replay
Install AREX
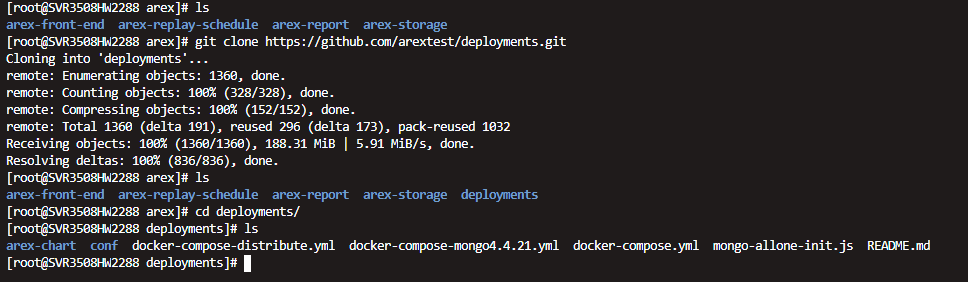
To remotely log in to 10.5.153.1, create a new directory named arex.
cd arex
git clone https://github.com/arextest/deployments.git
To start AREX, execute the following command:
# To read the docker-compose.yml file in the current directory and start the services
docker-compose up -d
# To read the docker-compose-distribute.yml file in the current directory and start the services
docker-compose -f docker-compose-distribute.yml up -d
# To read the docker-compose-mongo4.4.21.yml file in the current directory and start the services. Due to certain server hardware versions, it is not possible to start MongoDB 5.0.
docker-compose -f docker-compose-mongo4.4.21.yml up -d
After starting, you can use the docker-compose ps command to view the status and configuration of each service.
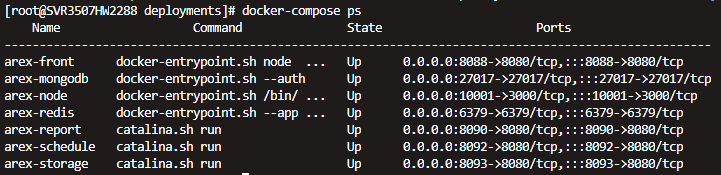
- State indicates the status of each service. If it shows "Up", then it is running correctly. If it shows any other status, you may need to restart the service or check the service logs to identify the reason for the failure to start.
- arex-front refers to the frontend, and by default, it runs on port 8088. You can modify the port according to your environment configuration, such as using port 80.
- MongoDB still uses the default port 27017. You can connect to the database using your MongoDB tool with the following connection address: 10.5.153.1:27017. The username is "arex" and the password is "iLoveArex". Please note that in the Docker Compose configuration, the connection address should be: mongodb://arex:iLoveArex@mongodb:27017/arex_storage_db. This is because Docker Compose uses the service name for network connections. Therefore, you can access MongoDB using the following address: mongodb://arex:iLoveArex@10.5.153.1:27017/arex_storage_db.
- arex-storage runs on port 8093, which needs to be specified in the agent configuration. In my environment, the storage address is configured as 10.5.153.1:8093.
You can use docker-compose images to view the versions of the running service components.

All components of AREX are version 0.2.10, except for the arex-node service, which will be removed in the future and has no updates, remaining at version 0.2.7.
After starting, there are two directories in the current startup directory. The arex-logs directory is used to store logs of each service, while the arex-data directory is used to store data.

After starting, you can view the logs in the command line using the following command:

docker-compose logswill display all the logs from all services.docker-compose logs arex-report-servicewill display the logs specifically for the Report service.
You can access the AREX front-end page at http://10.5.153.1:8088/. Once you're on the page, you will need to enter your email address to receive a verification code for logging in.

Now, the installation of AREX is complete.
Install community-test service
Download and compile AREX Agent
git clone https://github.com/arextest/arex-agent-java.git
cd arex-agent-java
mvn clean package
Compilation completed:
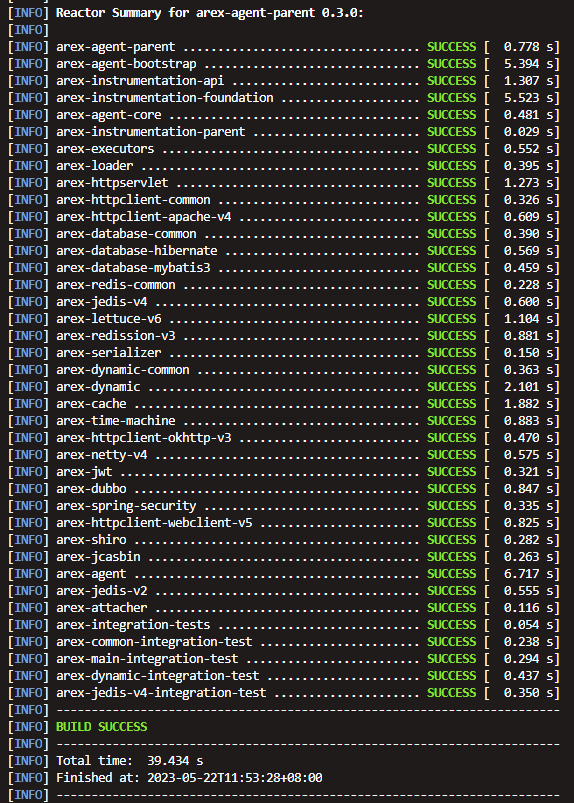
Check the arex-agent-jar directory in the current directory for the existence of the latest compiled arex agent jar file:

Compile community-test code
Pull code:
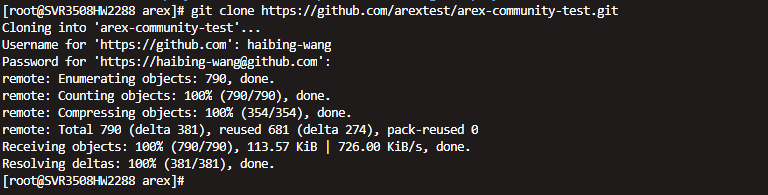
git clone https://github.com/arextest/arex-community-test.git
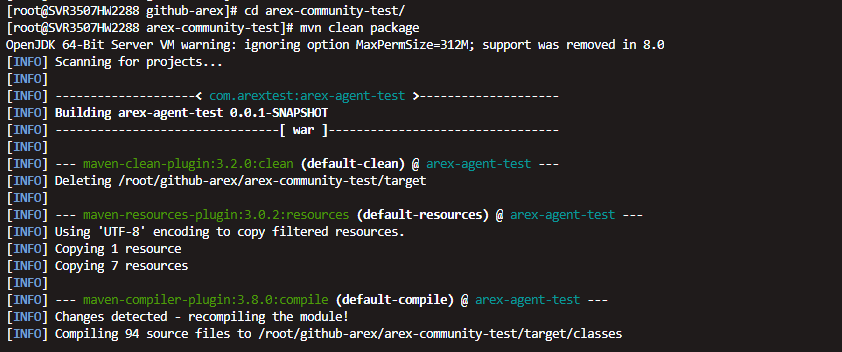
Use mvn clean package to compile the project
For easier execution, the community-test will be containerized and deployed.
FROM tomcat:9.0-jdk8-openjdk

ARG WAR_FILE=./target/arex-agent-test-0.0.1-SNAPSHOT.war
ADD $WAR_FILE /usr/local/tomcat/webapps/

WORKDIR /usr/local/tomcat/conf
RUN sed -i 'N;152a\\t<Context path="" docBase="arex-agent-test-0.0.1-SNAPSHOT" reloadable="true" />' server.xml

ADD ./arex-agent-0.2.0.jar /usr/local/tomcat/
ADD ./arex-agent-bootstrap-0.2.0.jar /usr/local/tomcat/

WORKDIR /usr/local/tomcat
EXPOSE 8080
CMD ["catalina.sh","run"]
Containerized build shell script example, provided for reference. Please note that relative directories may need to be modified:
cd ../arex-community-test
mvn clean package

cp ../deployments/dockerfile/community.Dockerfile ./Dockerfile
cp ../arex-agent-java/arex-agent-jar/arex-agent-0.3.0.jar ./arex-agent-0.3.0.jar
cp ../arex-agent-java/arex-agent-jar/arex-agent-bootstrap-0.3.0.jar ./arex-agent-bootstrap-0.3.0.jar

docker build -t arexadmin01/arex-community-test:0.0.1  .

rm -rf ./Dockerfile
rm -rf ./arex-agent-0.3.0.jar
rm -rf ./arex-agent-bootstrap-0.3.0.jar

cd ..
Now, the program image for testing has been successfully created.
configure the SUT application with AREX Agent
The original command line used to run the community-test tool, along with the database and Redis connection configurations, is as follows:
environment:
      - JAVA_TOOL_OPTIONS=-Dspring.datasource.url=jdbc:mysql://cmysql:3306/community?useUnicode=true&characterEncoding=utf-8 -Dspring.datasource.username=arex_admin -Dspring.datasource.password=arex_admin_password -Dspring.redis.host=credis -Dspring.redis.port=6379
The additional AREX configurations can be added to the command line as follows:
environment:
      - JAVA_TOOL_OPTIONS='-javaagent:/usr/local/tomcat/arex-agent-0.3.0.jar' -Darex.service.name=community-service -Darex.storage.service.host=10.5.153.1:8093 -Darex.enable.debug=true  -Dspring.datasource.url=jdbc:mysql://cmysql:3306/community?useUnicode=true&characterEncoding=utf-8 -Dspring.datasource.username=arex_admin -Dspring.datasource.password=arex_admin_password -Dspring.redis.host=credis -Dspring.redis.port=6379
In this configuration:
-javaagent:/usr/local/tomcat/arex-agent-0.3.0.jaris the path to the compiled AREX Agent JAR file, which will be loaded as a Java agent into the application.-Darex.service.name=community-serviceis the name of the application, which will be displayed on the AREX Replay page.-Darex.storage.service.host=10.5.153.1:8093is the address of the AREX Storage service, set to10.5.153.1:8093.-Darex.enable.debug=trueis a configuration option. If set totrue, it will run in debug mode, which records all traffic. It is recommended to set this tofalsein production environments.
Start the arex-community-test service, and visit the AREX front-end page to check the registration of the application:
It can be seen that the tested application community-test has been successfully running, and its access address is http://10.5.153.1:8080/.
Regression test
Release and run in production environment
Now, the arex-agent has been successfully started and running in the application. During the recording process, users do not need to perform any special operations or interventions. They can provide services to the outside world or manually access the application in the usual way.
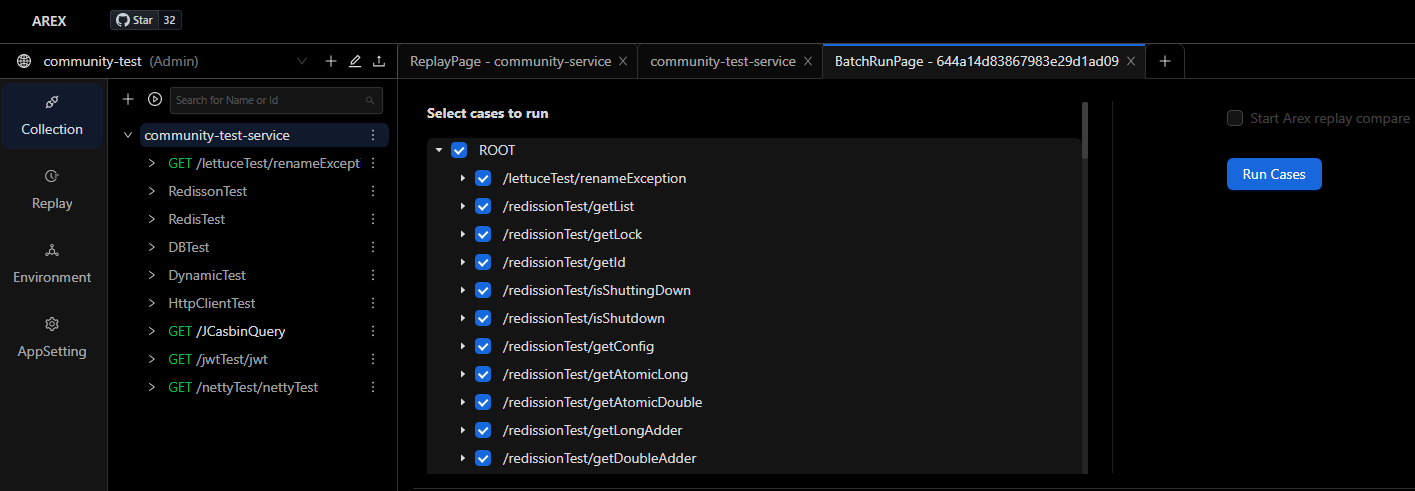
In the demonstration of this article, I used the batch execution feature in the Collection to access the community-service, and the access address was http://10.5.153.1:8080/.
During the access process, the arex-agent will automatically start recording and store the recorded AREX test cases without requiring manual recording operations from the user.
Business Code Update
When we need to compile and test a new version after implementing and submitting our business requirements, we can follow these steps:
- Pull the latest code.
- Compile the code and build the package.
- Important: Keep the configuration of the AREX Agent unchanged, especially the application name. AREX uses the application name to identify the application and manage the test cases. Therefore, during the compilation and testing process of the new version, the application name configuration should remain the same as the previous version.
- Deploy the code to the testing environment: Publish the compiled and packaged application code to the testing environment for further testing and validation.
Regression testing in the test environment
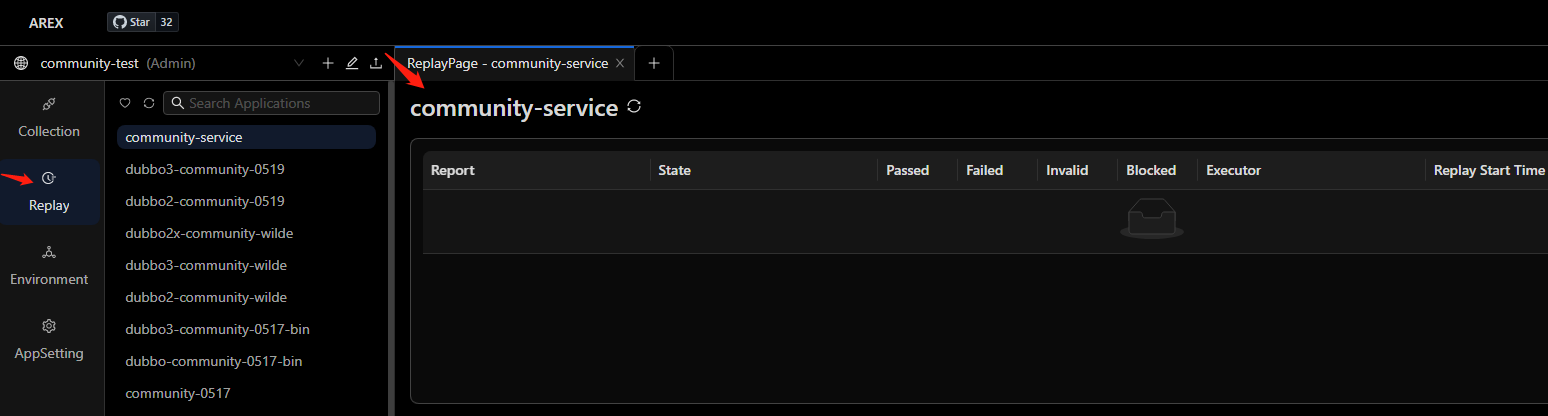
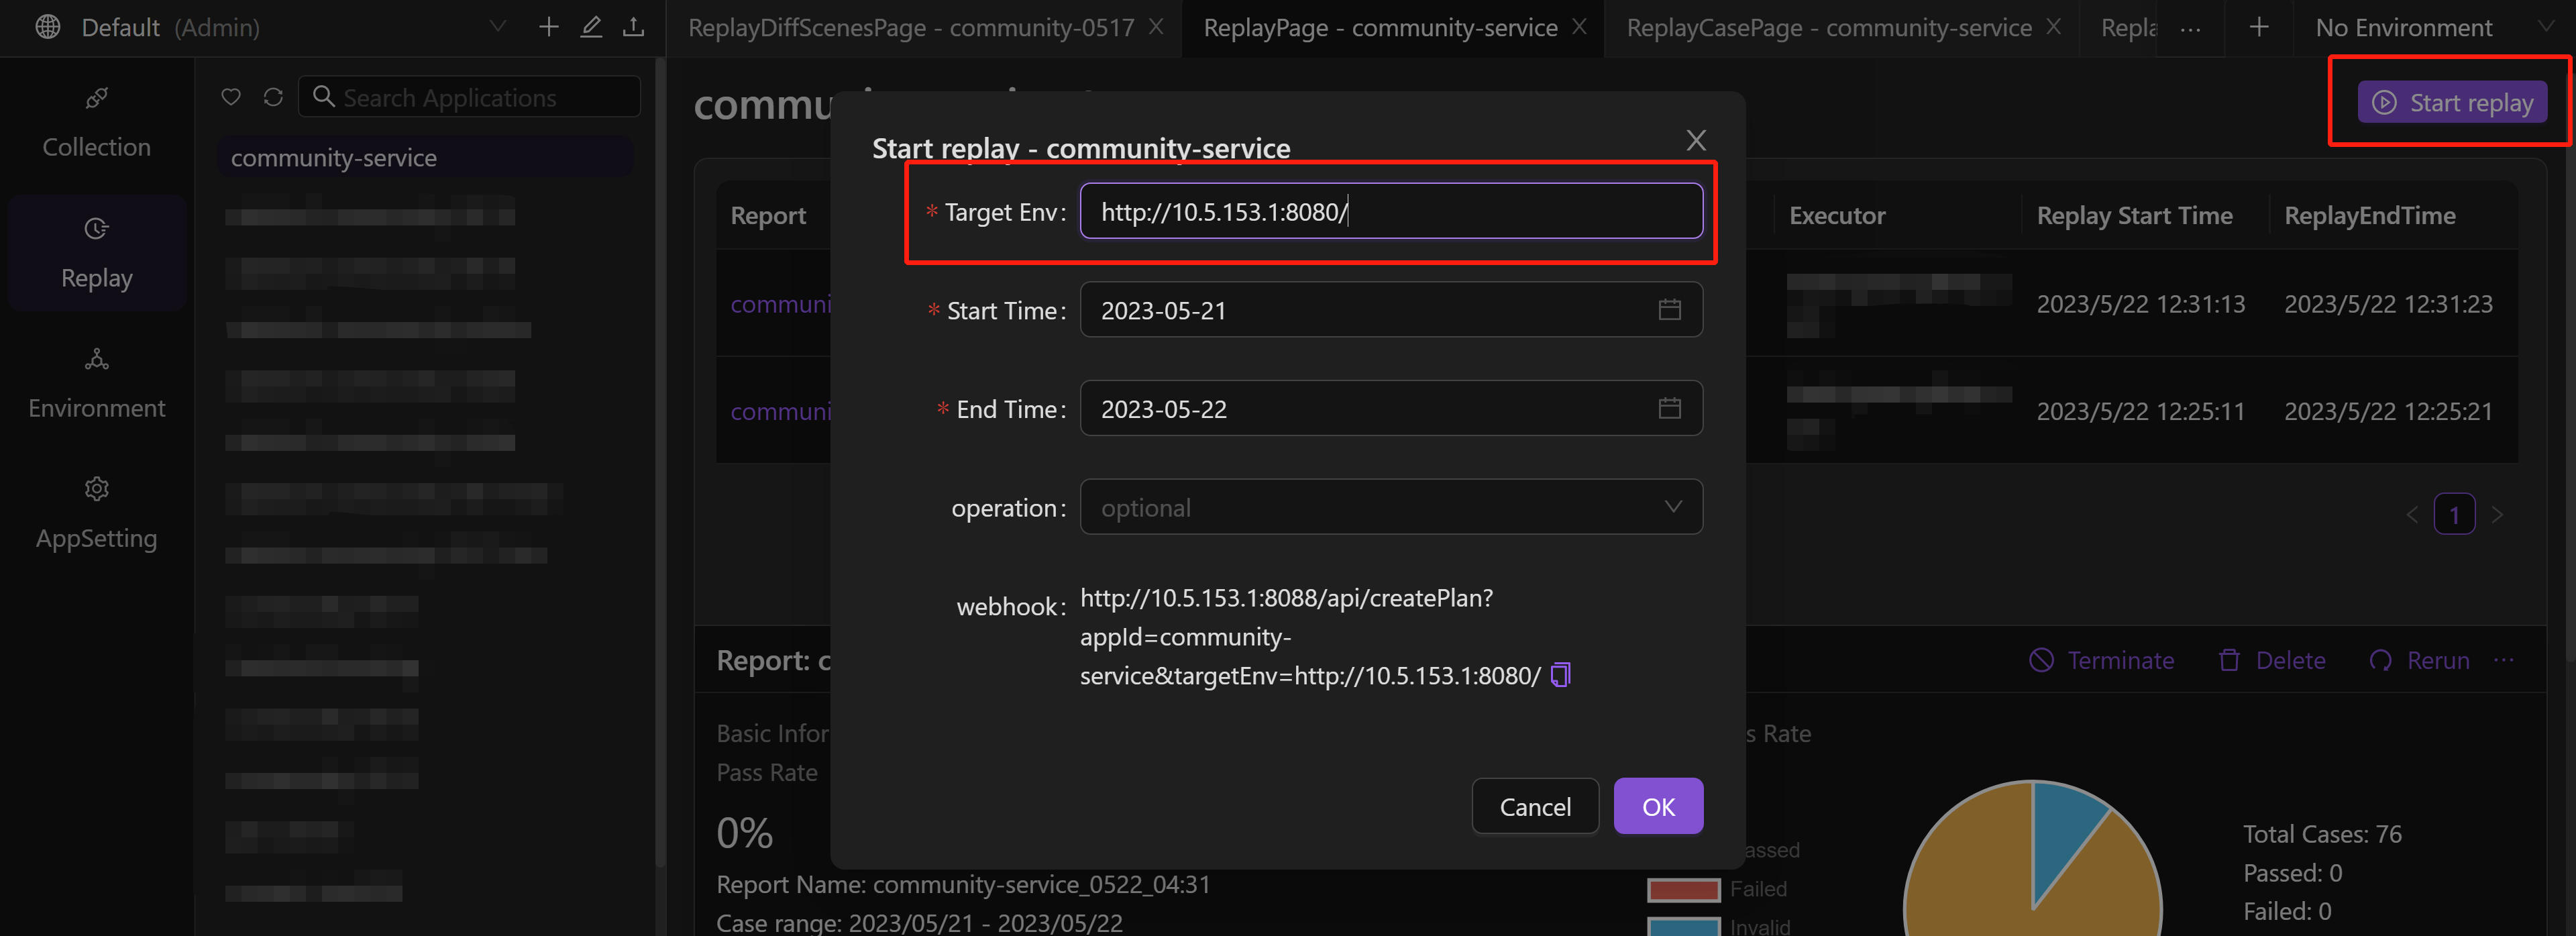
To access the AREX Replay page, select the community-service service, and click on the "Start Replay" button on the right-hand side of the replay interface. Enter the replay URL (in this case, it is http://10.5.153.1:8080/) and initiate the replay process.
Locate test problem
If the test comparison is executed for all cases and there are no differences found, then the test is considered passed.

If differences are found during the testing process, they can be identified as follows:

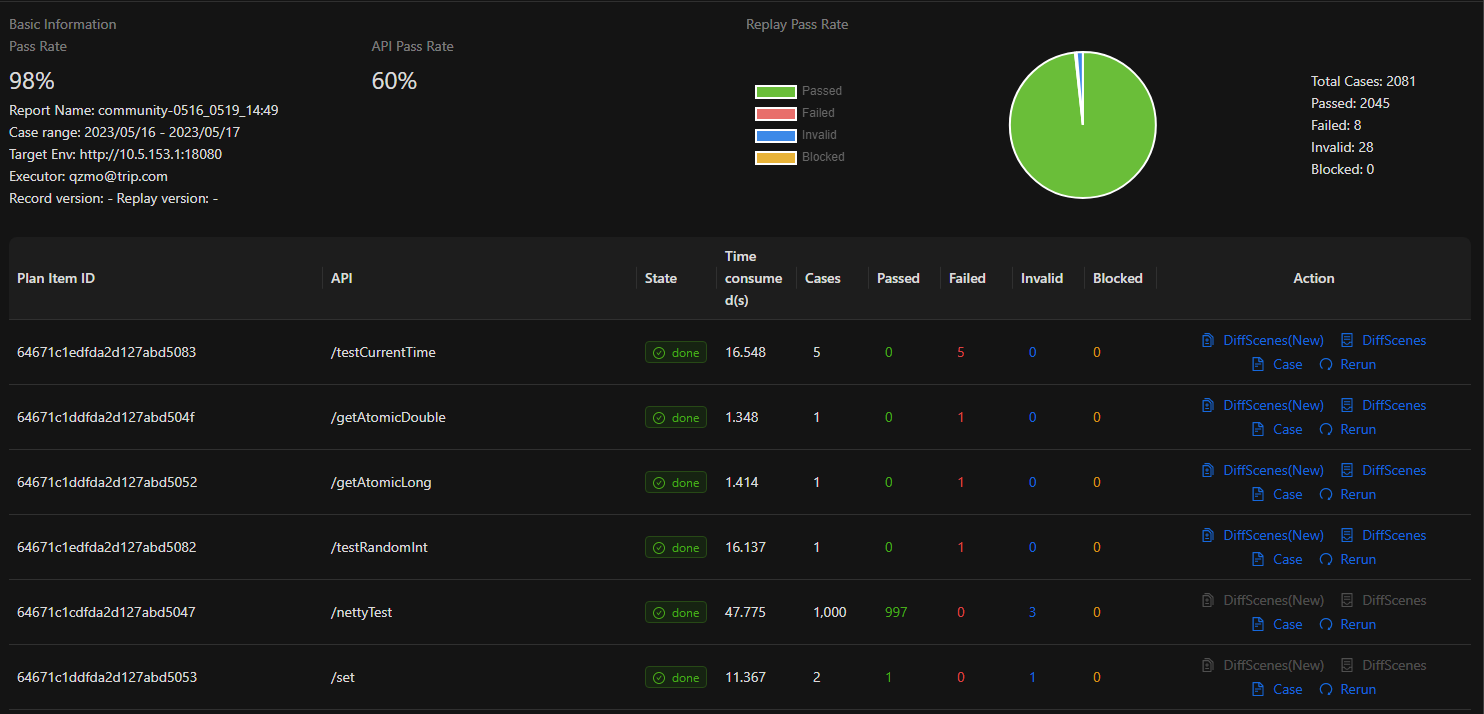
Click on the problematic replay report and all the interfaces and their regression testing status will display, as shown in the following image:
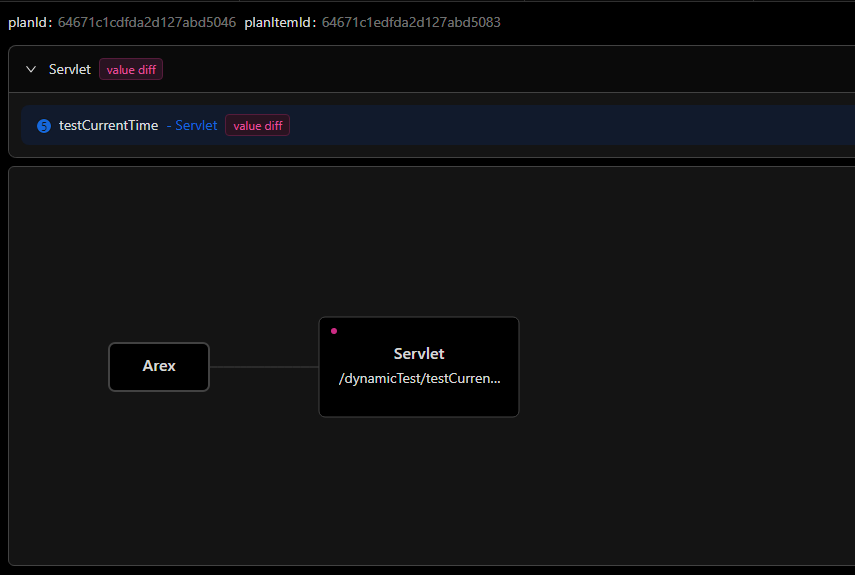
Click on DiffScenes(New) and an overall statistical view of the differences will display. The value diff represents the differences in values between the new and old versions.
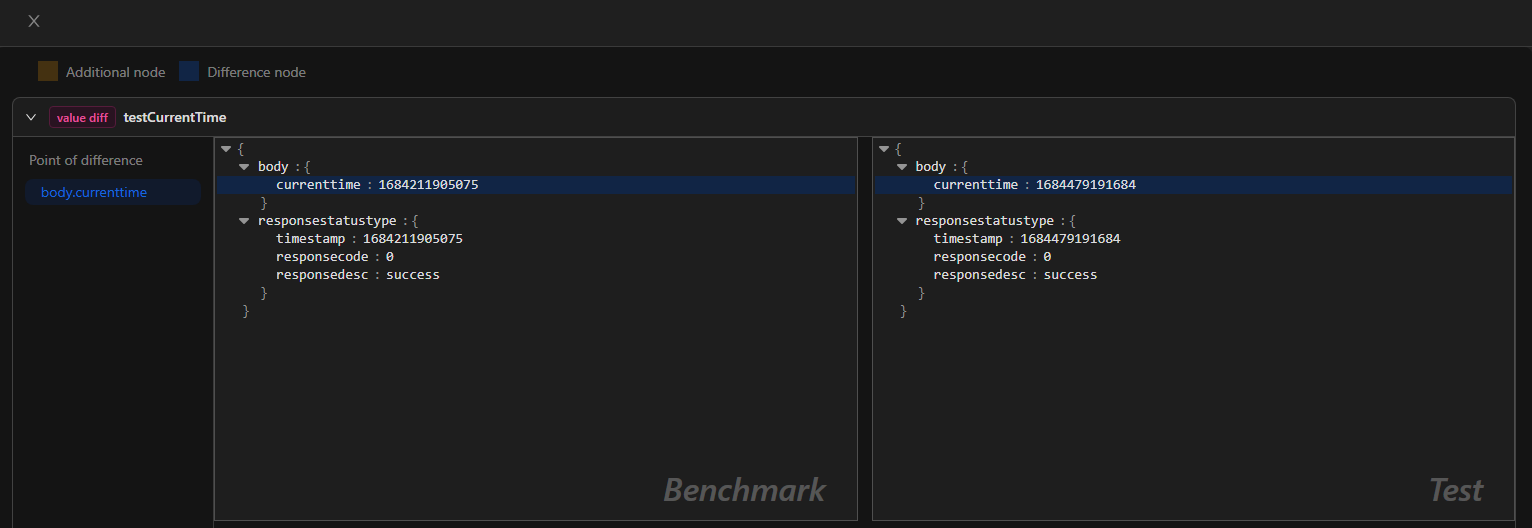
Continue to click on the difference points to view the detailed differences, as shown in the following image. On the left side is the benchmark, which represents the values recorded in the production environment. On the right side is the Test, which represents the values returned during the replay process in the testing environment. Any inconsistencies between the two indicate the difference information.
Based on the identified differences, follow these steps to find the points in the code where the issues exist:
- Identify the problem: Confirm the specific issue that needs to be addressed.
- Fix the problem: Make the necessary changes to the code to address the issue. Repeat the steps in the "Business Code Update" section: modify the code, test it, publish it, and perform the comparison.
- Confirm if it is not a problem: If the identified difference is determined to be within the expected range and does not indicate an actual issue, mark that node as a filtering node. This ensures that during future replays, the comparison will skip that specific node.
- Continue this process: Repeat the above steps for all identified difference points until they are either confirmed and fixed or determined to be within the expected range.
- Confirm the fixes and release versions: Once all the issues have been addressed and fixed, confirm the fixes and proceed with the release of the updated version.